A sub-account is a second sign-in for the same billing account — useful when a colleague, developer or agency needs to manage your services without sharing your password. This article covers creating one, what a sub-account can and cannot do, the password prompts that guard those changes, and how to remove one.
Before you start #
Warning: A sub-account is not a limited or read-only login. It works on your billing account: it can see your services, invoices and tickets, place new orders, and use your saved payment methods and account credit. Only give one to someone you would trust with the account itself.
Only the main account owner can manage sub-accounts. A sub-account that tries to open the page is refused with Sub-accounts cannot manage other sub-accounts.
What a sub-account can do #
| Can | Cannot |
|---|---|
| Sign in with their own email address and password | Create, edit or delete other sub-accounts |
| See the account’s services, servers, sites, domains and certificates | Have a separate credit balance — the balance is the owner’s |
| View, download and pay the account’s invoices | Have a separate address book or set of saved cards |
| Place orders, which are billed to the account owner | Set the default address, or delete one |
| Open and reply to support tickets on the account | Change the account’s currency |
| Add and edit addresses in the shared address book | See other customers’ data |
| Manage their own password and two-factor authentication |
Note: RackHelm does not offer per-feature permissions for sub-accounts. The only access control available on this screen is whether two-factor authentication is compulsory for them. Currency is the owner’s alone: a sub-account who opens their settings page will find no currency selector, and an attempt is refused with Sub-accounts use the account owner’s currency.
Creating a sub-account #
- Select Manage Sub-Accounts in the sidebar, or go to
/sub-accounts. - Select Create Sub-Account. You will be asked to confirm your own password before the form opens — see Why you are asked for your password.
- Fill in First Name, Last Name and Email Address — the address they will use to sign in, and one that is not already in use anywhere on the portal.
- Set a Password of at least 8 characters and repeat it in Confirm Password.
- Turn on Force Two-Factor Authentication (MFA) if they must set up an authenticator app before they can use the portal.
- Select Create Sub-Account.
Warning: Force Two-Factor Authentication (MFA) used to do nothing unless your provider had also switched forced two-factor on for the whole portal. That is fixed: the switch now works on its own. If you ticked it in the past and nothing ever happened, it will start happening — the colleague will be sent to Edit Profile → Two-Factor Auth on their next sign-in and told “You must enable Two-Factor Authentication to continue.” until they enrol. Check the Forced MFA column on the list and switch off anything you did not mean.
A verification email is sent to the address you entered. The sub-account must click that link before they can use the client area — this proves the address really belongs to them. Tell them the password you set out of band, and ask them to change it once they are in.
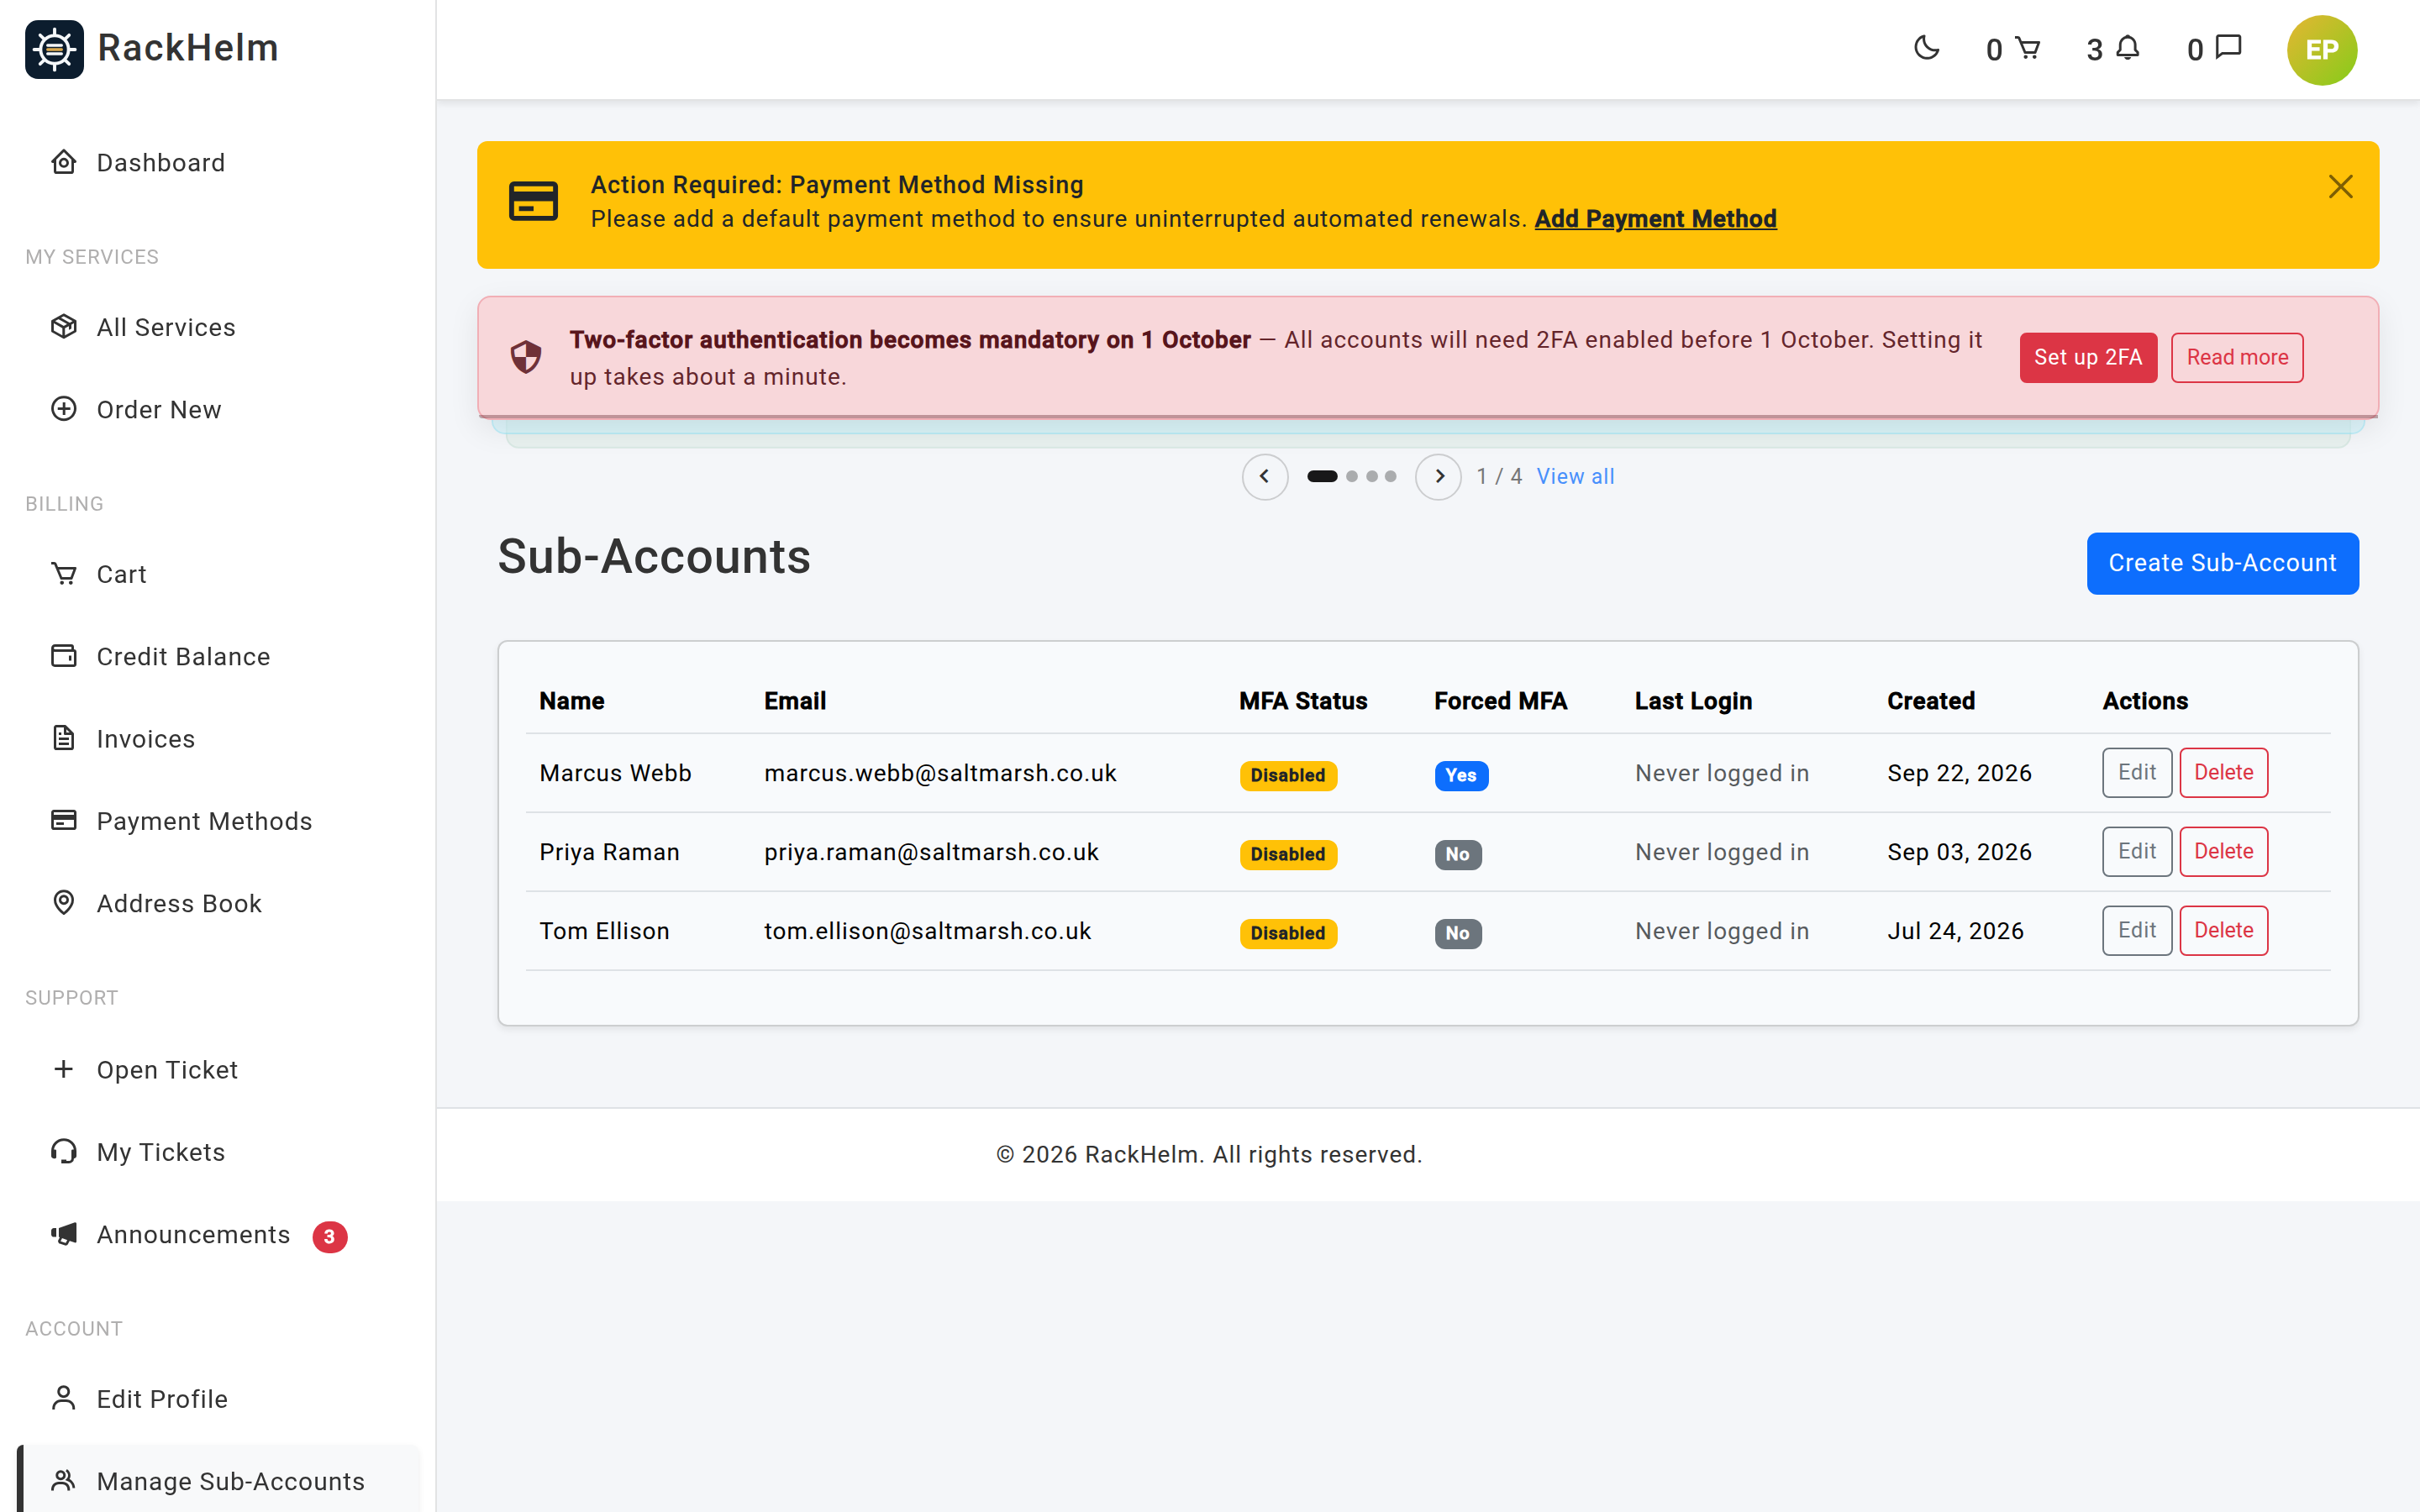
The sub-accounts list #
| Column | What it shows |
|---|---|
| Name / Email | Who the sub-account belongs to. |
| MFA Status | Activated once they have confirmed an authenticator app, otherwise Disabled. |
| Forced MFA | Yes if you require two-factor authentication for them. |
| Last Login | The most recent real sign-in, or Never logged in. Your provider signing in as that colleague to help them does not count as a login here. |
| Created | When you added them. |
| Actions | Edit and Delete. |
Why you are asked for your password #
Creating, editing and deleting a sub-account each sit behind a password re-prompt. You will see a page headed Confirm Password reading “Please confirm your password before continuing.”, where you enter your own account password — not the sub-account’s — and press Confirm Password.
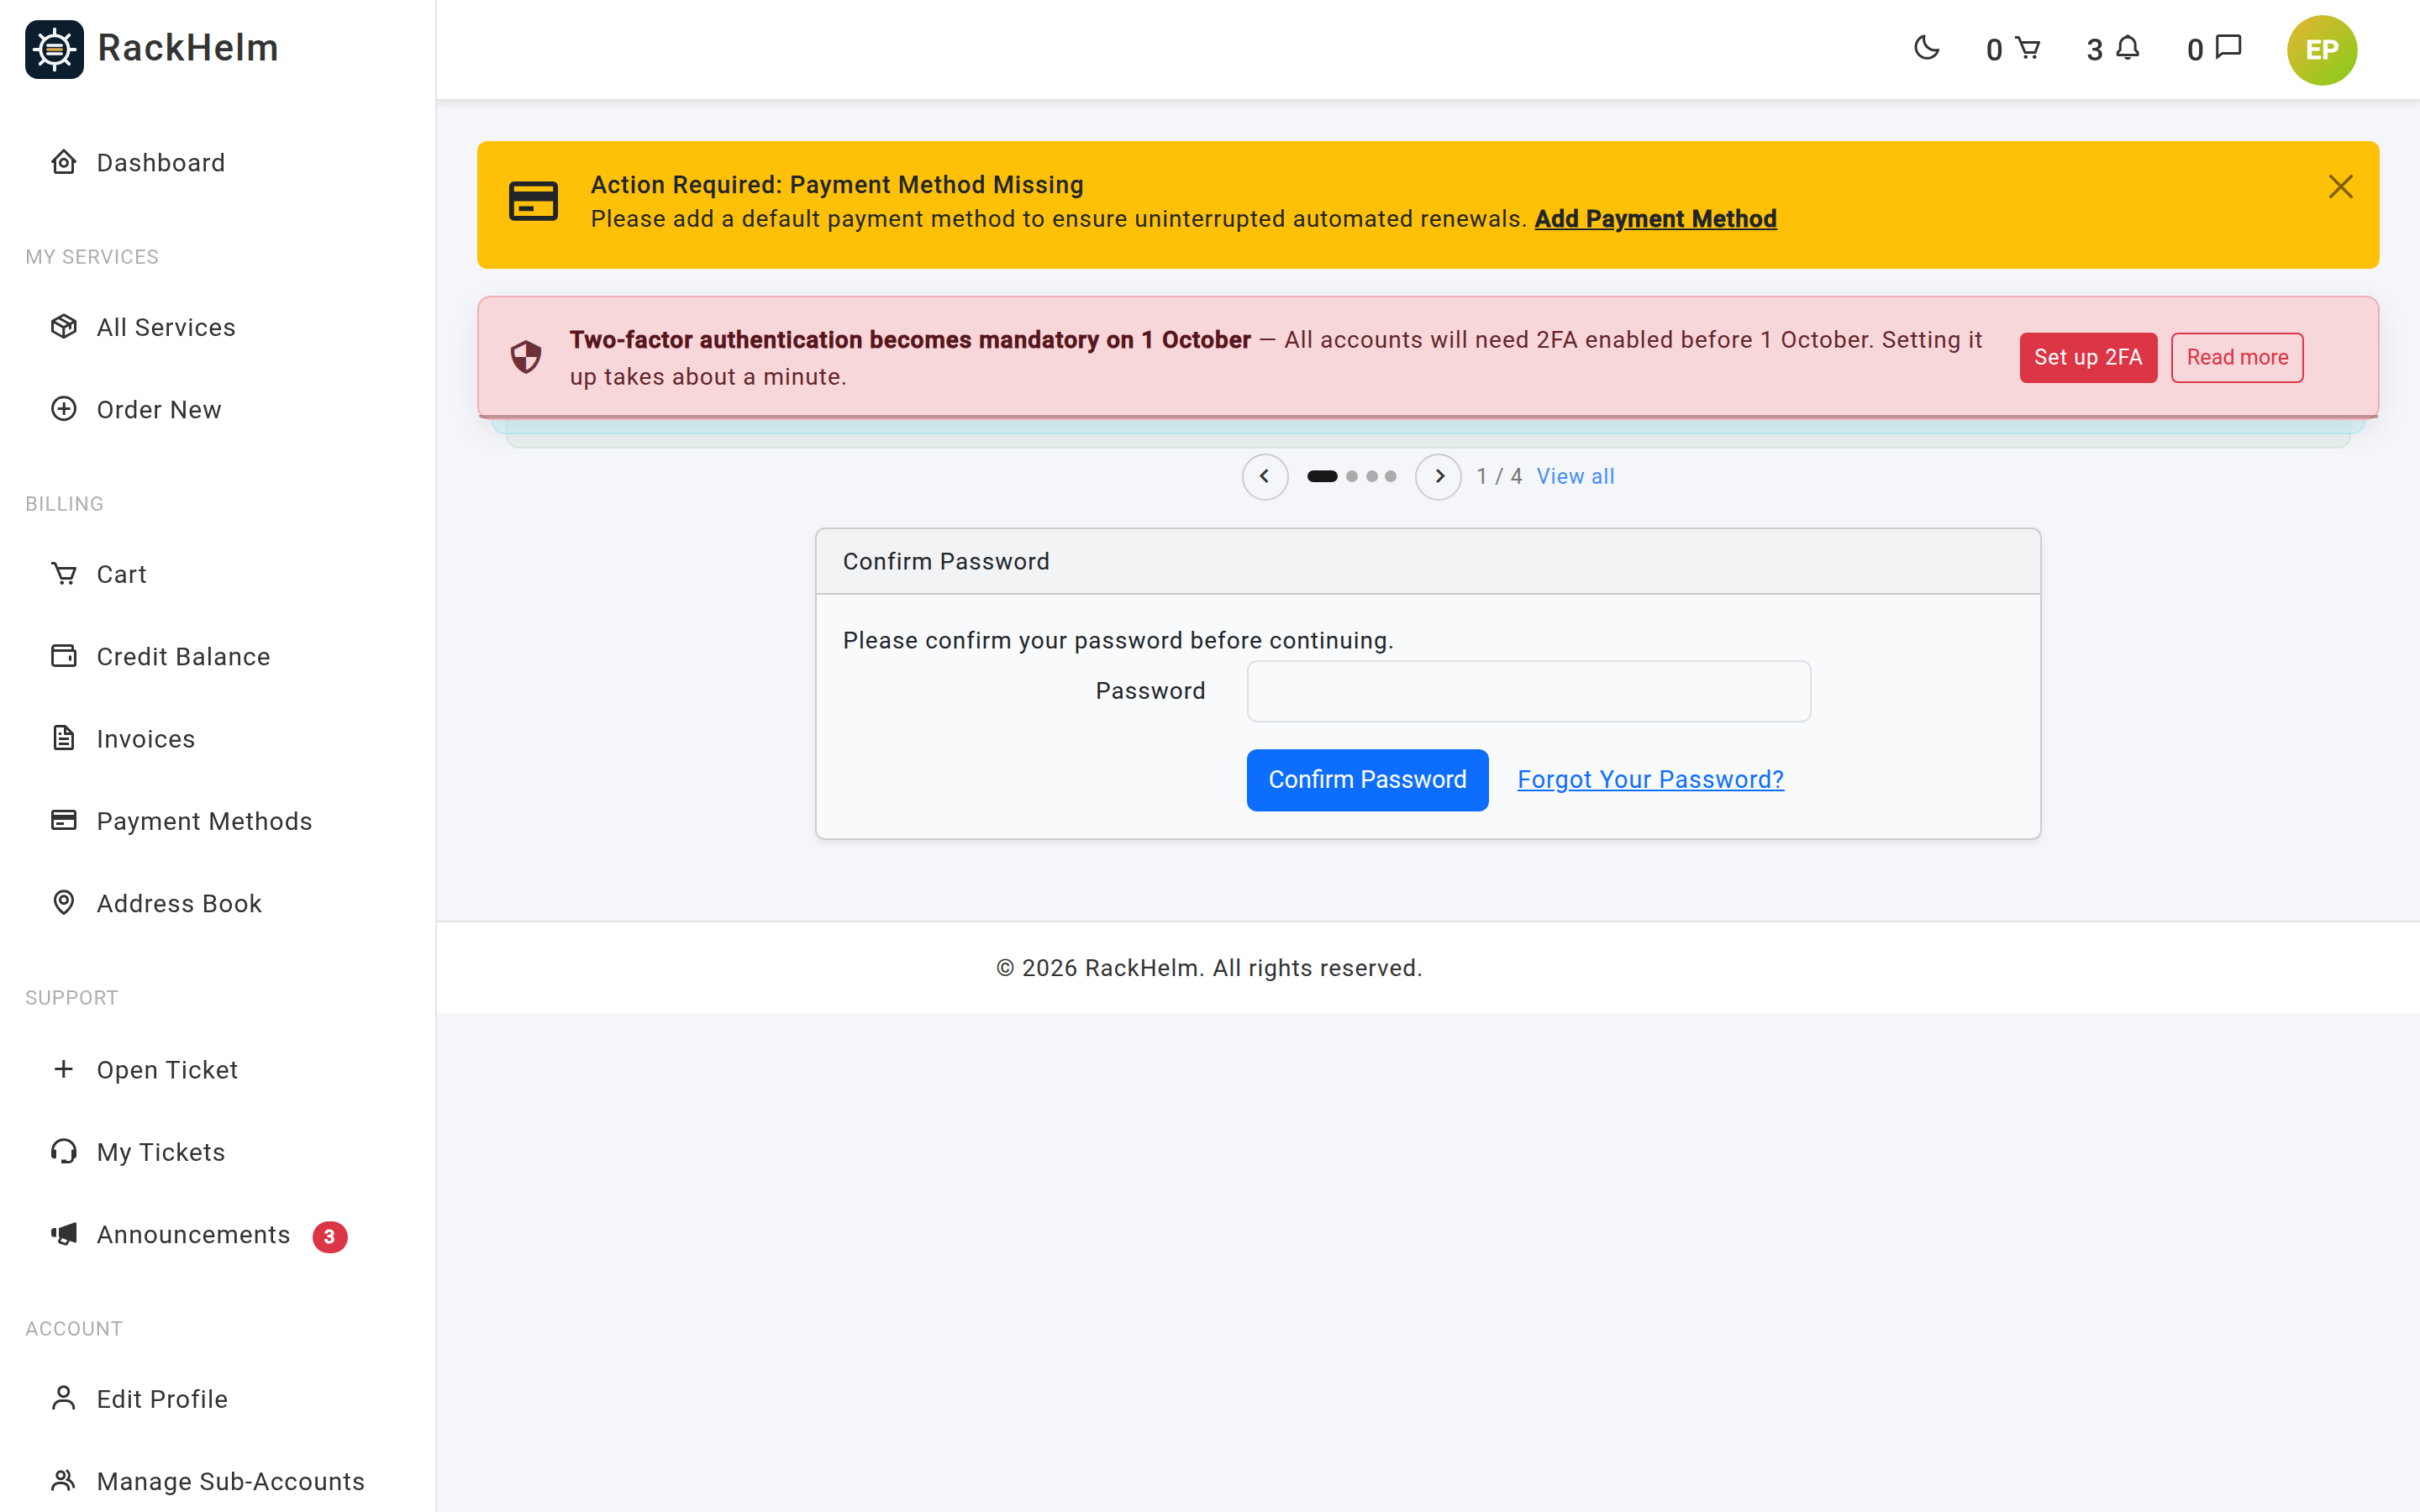
A sub-account is a working key to your account that survives your own password reset and your own “sign out everywhere”. The prompt is there so that nobody who finds your screen unattended can quietly cut themselves a second key.
Note: Confirming lasts about three hours, so one prompt covers the whole session’s work. On Create Sub-Account and Edit the prompt comes first and the form opens afterwards. On Delete it comes on the delete itself, and confirming lands you back on the sub-accounts list with the colleague still there — press Delete again to finish the job. That is the expected behaviour, not a failure.
Editing a sub-account #
Select Edit. You can change the name and email address, set a new password under Change Password (leave both boxes blank to keep the existing one), and switch Force Two-Factor Authentication (MFA) on or off.
Changing the email address clears verification on that sub-account and sends a fresh verification link to the new address — they cannot use the portal again until they click it.
Removing a sub-account #
Select Delete and confirm, re-enter your own account password if you are asked, then press Delete once more. Their sign-in stops working immediately. Your services, invoices and tickets are unaffected — they belong to the billing account, not to the sub-account.
Tip: When someone leaves, delete their sub-account and then use Forget Devices & Log Out on your own Two-Factor Auth tab if you also shared any credentials with them.
Troubleshooting #
| Symptom | Cause and fix |
|---|---|
| “Sub-accounts cannot manage other sub-accounts.” | You are signed in as a sub-account. Ask the account owner to make the change. |
| “The email has already been taken.” | That address already exists on the portal — possibly as a customer of its own, or from a previous contact-form message. Use a different address. |
| The sub-account cannot get past the verification screen | The link was never clicked or has been superseded. Ask them to use Resend Verification Email — there is a 30-second wait between sends — or edit the sub-account and save with the correct address to send a fresh link. Your provider can also resend the link or mark the address verified for you; raise a ticket if the email never arrives. |
| They are stuck on the Two-Factor Auth tab | Force Two-Factor Authentication (MFA) is on for them, or your provider requires it portal-wide. They must complete enrolment; turn the switch off if it was set by mistake. |
| You had Forced MFA set to Yes and they were never asked to enrol, but now they are | Expected after the upgrade to 1.0.1.1. The switch was previously suppressed unless your provider had forced two-factor on portal-wide; it now applies on its own. |
| MFA Status stays Disabled | They started enrolment but never confirmed a code. It only becomes Activated after confirmation. |
| The sub-account sees no credit balance of their own | Correct. Credit, addresses and payment methods all belong to the billing account. |
| The sub-account has no currency selector | Correct. Only you, as the account owner, choose the currency: Sub-accounts use the account owner’s currency. |
| The sub-account can add an address but not delete one or make it the default | Correct. Those two actions are reserved for your own login. |
| Creating, editing or deleting asks for a password | Expected — each is a sensitive action and needs your own account password. See Why you are asked for your password. |


