- Before you start
- 1. Secure the owner account
- 2. Company details
- 3. Branding
- 4. Mail — do this before anything that sends
- 5. A payment gateway
- 6. Billing preferences
- 7. Billing cycles
- 8. One product group and one product
- 9. An integration
- 10. Automation: the cron entry and the queue
- 11. Roles and staff
- 12. Content, support and security
- 13. Place a test order
- Troubleshooting
RackHelm installs with almost nothing switched on. That is deliberate — a fresh install cannot accidentally charge a card, e-mail a customer or delete a hosting account. This checklist is the order to switch things on in, so each step works by the time you test it. Later steps depend on earlier ones: you cannot test a payment before mail works, or provisioning before the queue runs.
Before you start #
You need the seeded owner account. The installer creates a Super Admin with the e-mail admin@orbi-hosting.com and a random 16-character password, printed once to the console during installation. If you did not keep it, reset it from the command line first.
Warning: That address is the same on every install. Changing it and its password is step 1 for a reason.
1. Secure the owner account #
Sign in as the seeded Super Admin, open /settings, change the e-mail address to your own, set a new password and enable two-factor authentication. Later, under Security → MFA, decide whether to force two-factor on staff roles.
2. Company details #
Open Platform Settings → General & System. These values feed your invoices, your store metadata and the placeholder tokens in content pages, so do them properly once.
| Field | What it does |
|---|---|
| Company Name, Company URL, Public Contact Email, Address | Your trading identity. Used throughout the portal and on invoices. |
| Default Landing Page | What visitors see at the root domain: the store, or any published content page. The switch beneath decides whether / redirects there or serves the page in place. |
| Store Template | Classic, Modern Dark or Modern Clean. |
| Registered Company Name, Company Registration Number, VAT Number, Registered Office Address | Legal details for invoices and policy pages; name and address fall back to the trading ones if blank. |
| SEO Title (Fallback), SEO Description, SEO Open Graph Image (Fallback) | Store-wide fallbacks for pages with no SEO of their own. |
| Maintenance Mode (Disable Non-Staff Logins) | Exactly what the label says. Useful while you finish this checklist; a Maintenance Message field sits beneath it. |
| Application Error Notification Email(s) | Comma-separated addresses for error alerts. Set at least one. |
Tip: Behind a load balancer or Cloudflare, fill in Trusted Proxies on this screen. Without it every customer appears to come from the proxy’s address, which breaks fraud screening and authentication logs.
3. Branding #
Open Platform Settings → Theme Settings and upload the Favicon, the Navigation Bar Logo and the Minimized Logo used when the sidebar is collapsed. If your logo already contains your name, tick the option to hide the company name beside it. The light and dark colour palettes and the footer text are on the same screen.
4. Mail — do this before anything that sends #
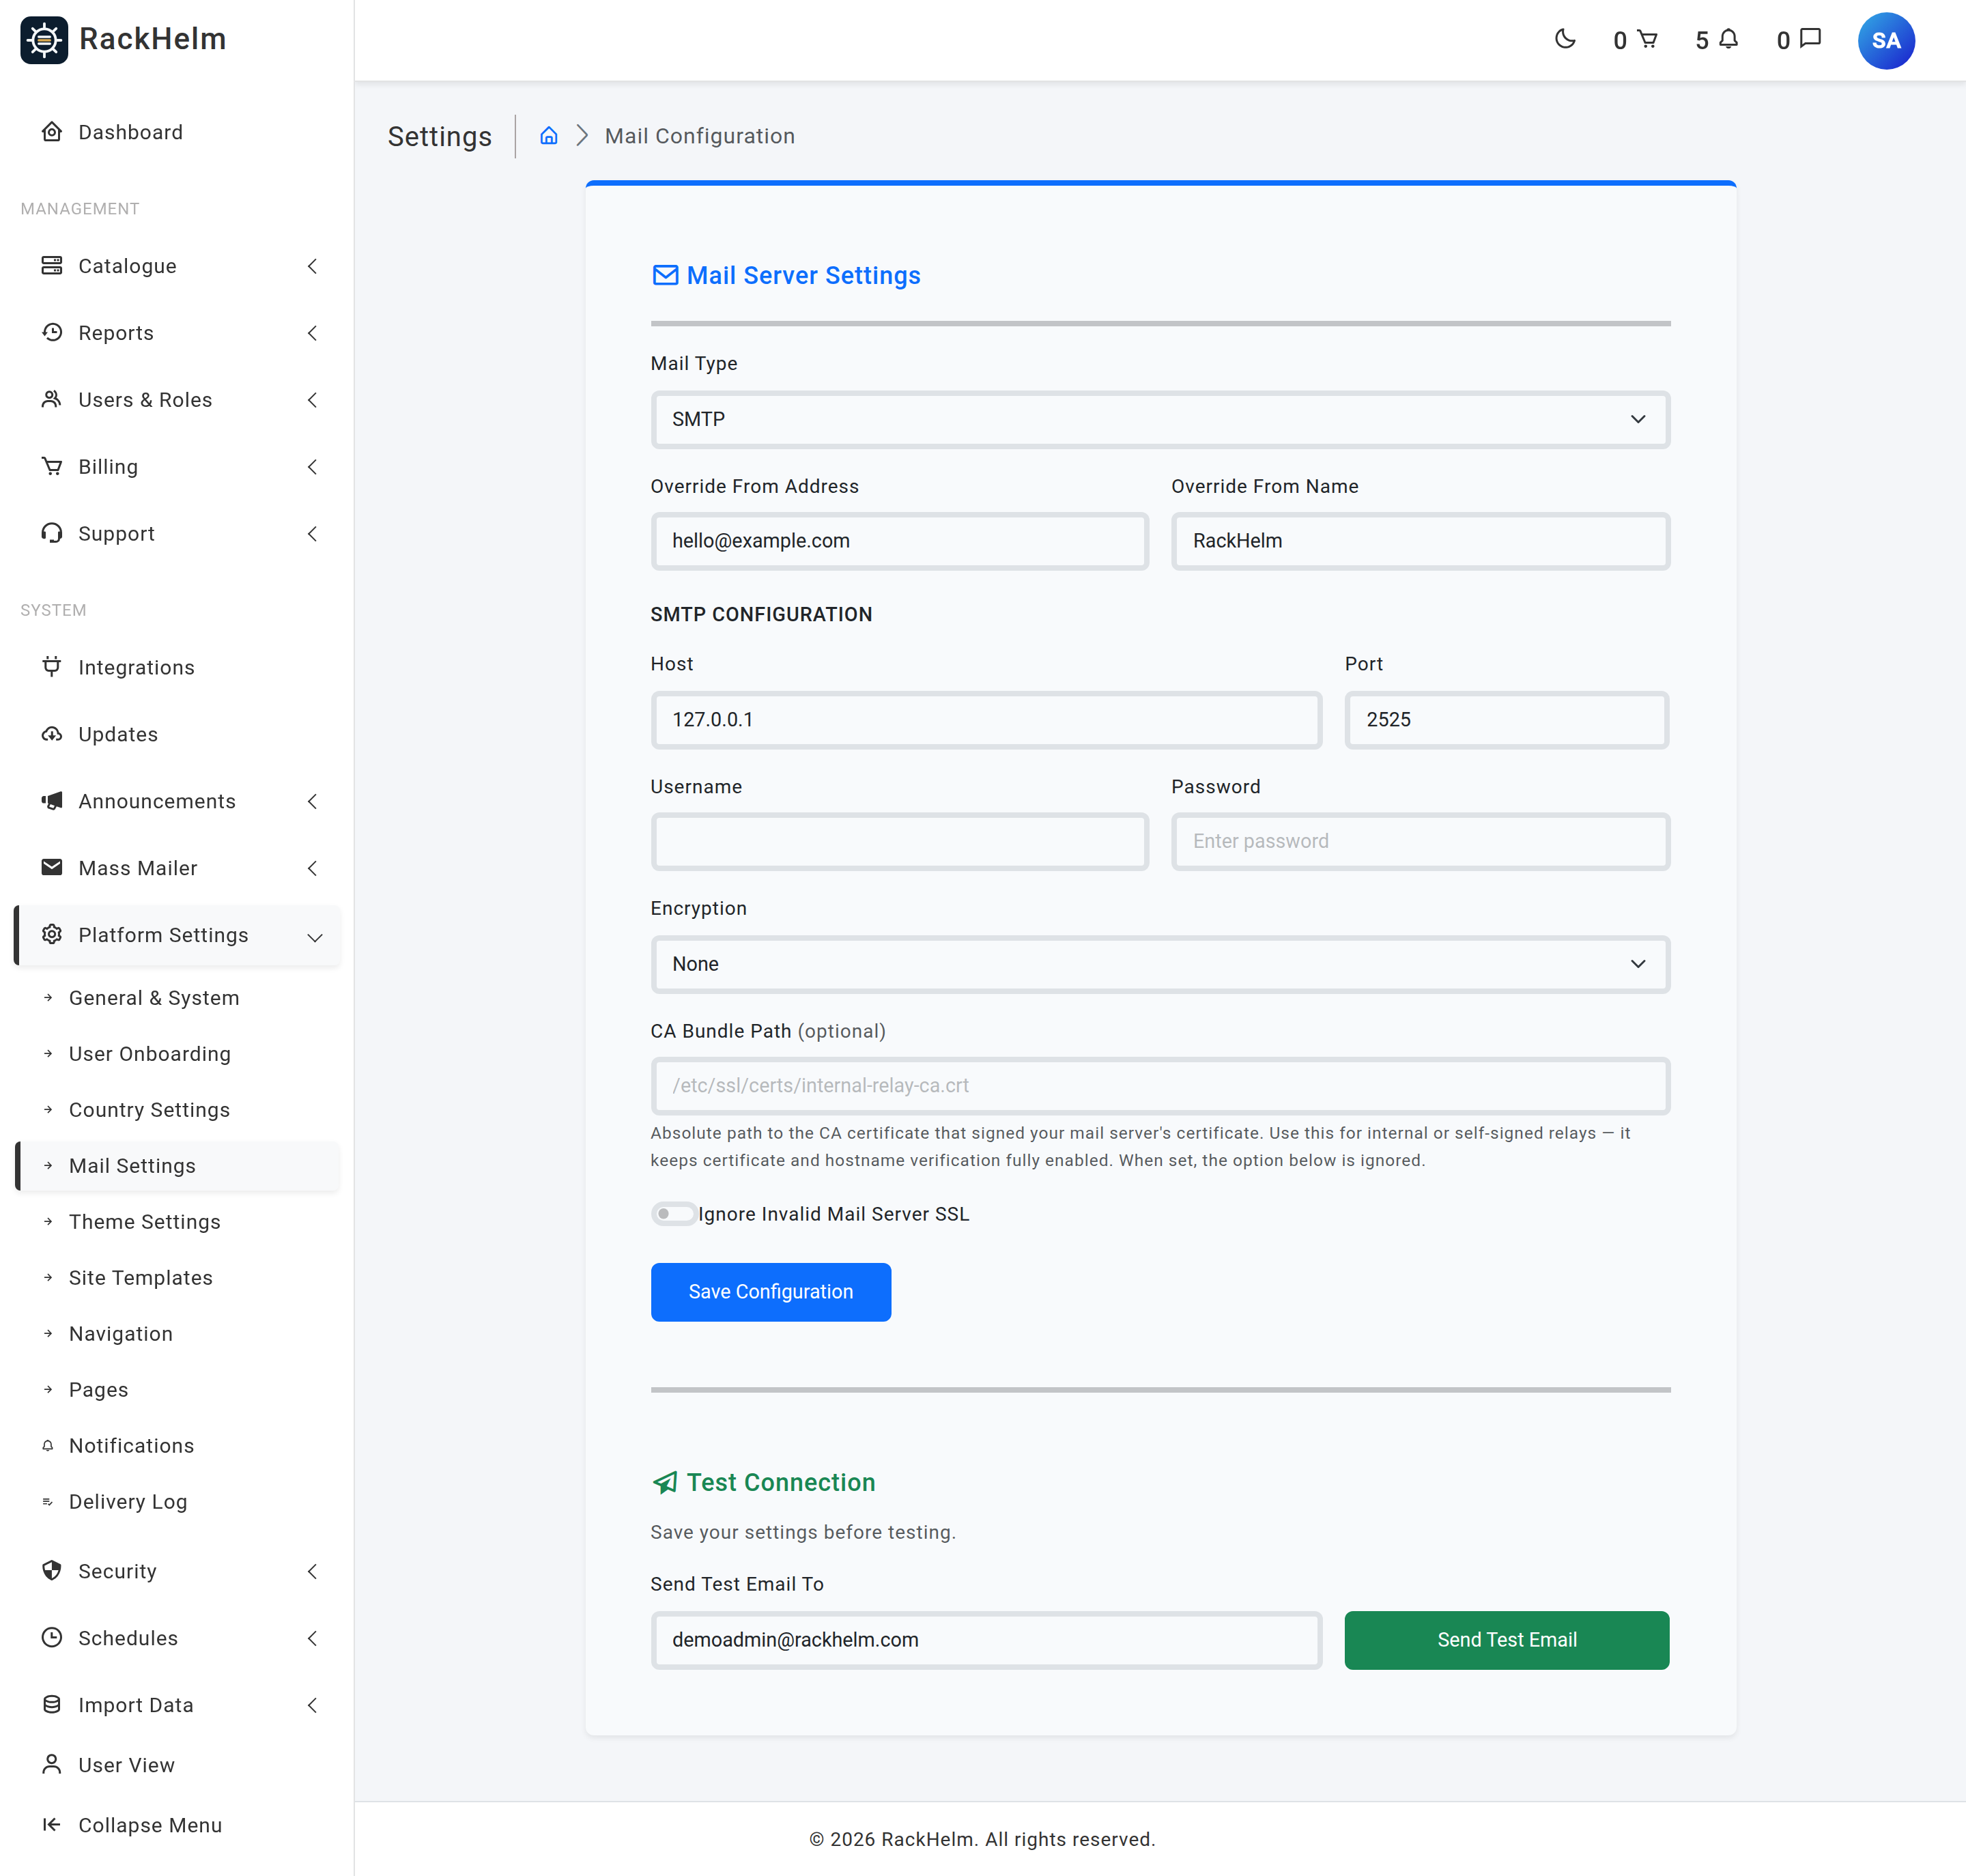
Open Platform Settings → Mail Settings. Mail is configured in the database, not only in .env. Choose Mail Type (SMTP or PHP Mail Function (Sendmail)), set the required Override From Address and Override From Name, and for SMTP fill in Host, Port, Username, Password and Encryption (TLS, SSL or none). Save, then use Send Test Email To and confirm the message arrives.
Note: The password field never loads with the stored value in it. Saving it empty keeps the existing password rather than clearing it.
5. A payment gateway #
Open Billing → Payment Gateways and add one. Four drivers are available — Stripe, PayPal, Square and Bank Transfer — and each may be configured once, so you cannot create two Stripe rows.
Choose the provider, set Mode to Sandbox / Test while you are still setting up, enter the provider’s keys and save. Leave Enable Gateway off until the keys are right.
6. Billing preferences #
Open Billing → Settings and decide:
- Enable User Credit Deposits — whether customers may top up a balance. Off by default.
- Merge Same-Day Invoices — combine one customer’s invoices falling due on the same day.
- PDF Template — the invoice layout.
- Global Late Fee Defaults — Enable Global Late Fees, Fee Type, Fee Amount / % and Grace Period (Days). Products and billing cycles can override these.
- Global Affiliate Settings — Default Commission Type and Global Commission Amount / %.
7. Billing cycles #
Open Catalogue → Billing Cycles. Each cycle needs a Months value — a whole number of 1 or more, unique across all cycles — and a Label such as “Monthly” or “Annually”. Create the cycles you sell on before you create products, because a product’s prices are entered per cycle.
8. One product group and one product #
- Open Catalogue → Catalogue & Groups and use New Group. The group is what the store lists first.
- Use New Product and work through the five tabs: General (name, description, group, active, stock), Pricing (a price per billing cycle plus any setup fee), Provisioning (the integration binding, step 9), Options (custom fields, variables and addons) and Store & SEO (store visibility, highlighting and metadata).
- Visit
/storeas a customer would and confirm the product appears at the price you expect.
Note: Creating and editing a group goes through a controller that requires the
staff_panelability, which is not a seeded permission. Do this step as a Super Admin. Products themselves need onlyedit_products.
9. An integration #
This is two separate steps, and missing the second is the most common setup mistake.
- Open Integrations, pick your panel or registrar, enter its credentials and use the Test buttons until the connection succeeds.
- Go back to the product, open its Provisioning tab, bind it to that panel and make sure the binding is active. A product with credentials configured but no active binding never provisions.
10. Automation: the cron entry and the queue #
The scheduler #
The installer configures Horizon under supervisor, but it does not add the scheduler’s cron entry. Add it as the web user:
* * * * * cd /var/www/rackhelm && php artisan schedule:run >> /dev/null 2>&1The queue worker #
Provisioning, payment attempts, PDF generation and outbound e-mail are all queued, so if the worker is stopped everything silently piles up. Confirm it is running:
supervisorctl status rackhelm-horizonTurn the schedules on #
Every system schedule ships disabled. Open Schedules and enable the ones you need, with the seeded timings shown below.
| Schedule | Seeded timing |
|---|---|
| Provision Orders — nothing is provisioned without it | Every minute |
| Generate Invoices — raises renewal invoices | Daily at midnight |
| Process Due Invoices — attempts automatic payment | Daily at midnight |
| Invoice Reminders — chases unpaid invoices | Daily at midnight |
| Process Cancellations — terminates cancelled services | Daily at midnight |
| Suspend Overdue Services — and opens a ticket | Daily, 7 days overdue |
| Terminate Overdue Services | Daily, 14 days overdue |
| Email to Tickets — inbound mail becomes tickets | Every 5 minutes |
| Apply Late Fees | Daily, 7 days |
| Auto Close Tickets | Daily, 7 days |
| Notify Expiring Cards | Daily at midnight |
| Mass Mailer — sends scheduled campaigns | Daily at midnight |
| Domain Updater — completes in-flight eNom domain transfers | Daily at midnight |
Warning: Check the Days option on Generate Invoices before you enable it. The default look-ahead list is
14,7,1,-1,-7,-14and the largest value is what sets the advance window. Saving that field empty collapses the window to zero, and renewals then only bill on the exact due date.
11. Roles and staff #
Open Users & Roles → Roles & Permissions. Five roles are built in: Super Admin, Administrator, Billing Manager, Support Agent and Client.
Administrator receives every permission except a deliberate deny-list. Before handing that role out, know what it withholds: editing and deleting roles, company settings, e-mail routes, schedules, client impersonation, notifications and their delivery log, and Custom APIs. Grant any of those individually if someone needs them.
Create your staff users under All Users and give each one a role. Admin access comes from the role’s Staff role switch, not from any single permission.
12. Content, support and security #
The last pass, in whatever order suits you:
- Platform Settings → Pages — edit the seeded legal templates to match your business and have a solicitor check them before publishing. Page groups own the URL prefix, so settle that before links accumulate.
- Platform Settings → Navigation — build your menus if the defaults do not suit.
- Platform Settings → Country Settings — enable the countries you sell to.
- Platform Settings → User Onboarding — the address and payment-method wizard for new customers.
- Support → Departments, Ticket Settings and Email Routing — routing targets, ticket numbering, upload rules and the mailboxes that become tickets.
- Security → Captcha Protection, MFA, Password Policy and Fraud Protection.
13. Place a test order #
The only real proof that the chain works. With your gateway in sandbox mode:
- Register a test customer and buy the product you created, using the gateway’s test card.
- Confirm an invoice was raised, marked paid, and that its PDF downloads.
- Watch Users & Roles → Pending Provisioning: the item should reach provisioned within a minute or two.
- Confirm the account, server or domain really exists on the remote panel.
- Sign in as the test customer and confirm the service appears under All Services with a working management link.
When all five succeed, switch the gateway to live mode and turn off maintenance mode.
Troubleshooting #
| Symptom | Cause and fix |
|---|---|
| Nothing scheduled ever runs. | Either the cron entry is missing, or every schedule is still disabled — they all ship off. Check both. |
| Schedules are enabled but jobs never complete. | The scheduler only queues work; Horizon has to run it. Check supervisorctl status rackhelm-horizon and the Queue Monitor. |
| A schedule silently stops working after you edit it. | An invalid cron expression is skipped and logged rather than registered. Re-check the minute, hour, day, month and weekday fields. |
| The test order is paid but nothing is provisioned. | Work the three conditions in order: is there a paid invoice on the order, does the product have an active integration, and is Provision Orders enabled? They are explained in How RackHelm fits together. |
| The test e-mail sends but customers get nothing. | Customer mail is queued. A working test send proves the SMTP credentials, not that the worker is running. |
| The product does not appear in the store. | Both the product and its group must be active and included in the store. Check the product’s Store & SEO tab and the group’s store setting. |


