This is a worked example that takes an empty catalogue and ends with a shared-hosting plan a customer can buy, configure and have provisioned automatically. It touches every screen in this category in the order you actually need them. Follow it once and the pattern will carry over to VPS, game servers and domains. This article is for operators.
Before you start #
- Sign in as a Super Admin. Several catalogue screens check capabilities that are not seeded to any other role, so a lesser staff account will hit a 403 partway through.
- If you want automatic provisioning, connect and enable your control panel first, so it appears in the product’s Integration Type list. You can complete every other step without it and add the integration later.
The plan we are going to build:
| Item | Value |
|---|---|
| Group | Web Hosting (Product Grid layout) |
| Product | Starter Hosting |
| Terms | Monthly £4.99, Annually £49.99, with a £10.00 setup fee on monthly only |
| Asks the customer for | A primary domain name |
| Optional extra | Extra Disk — 10 GB or 25 GB |
| Launch offer | 25% off the first invoice, code LAUNCH25, first 100 customers |
Step 1 — Create the billing cycles #
Nothing can be priced until cycles exist, and a new install has none.
- Open Catalogue → Billing Cycles.
- Click New Billing Cycle. Label
Monthly, Months1, Sort Order0, Active on. Save. - Repeat for label
Annually, Months12, Sort Order1.
Both should now show as Active with “Unused” in the Used By column. See Billing Cycles.
Step 2 — Create the custom field the plan needs #
Shared hosting needs a domain to attach the account to.
- Open Catalogue → Custom Fields → New Field.
- Display Name:
Primary Domain. - System Key:
DomainName— match whatever key your panel integration expects, not the friendly label. - Field Type: Text Input.
- Description: something like “The domain this hosting account will serve, without www.” It doubles as the placeholder.
- Leave Required Field on. Save.
See Custom Fields.
Step 3 — Create the product group #
- Open Catalogue → Catalogue & Groups and click New Group.
- On General: Group Name
Web Hosting, a short description, Page Layout Product Grid. - On Display & SEO: Group Sort Order
0, leave Include in Store and Allow Direct Link on, and switch Show Cycle Savings on so the annual term advertises its saving. - On Configurable Options: tick Primary Domain and leave all three switches on — every plan in this group will need it.
- Click Create Group.
Tip: Assigning the field to the group rather than to each product means every future hosting plan inherits it automatically. See Configurable Options.
Step 4 — Create the add-on #
- Open Catalogue → Product Addons → New Addon.
- Addon Name
Extra Disk, CategoryResources, a one-line description. - Leave Linked Custom Field as “— None —” unless you have a disk-quota field your panel reads; if you do, pick it here.
- Leave Needs provisioning and Include in store on, Manual (staff setup) off.
- Click Create & Configure Options.
- On the configuration screen click Add Option twice and fill in:
- Label
+10 GB, Value10240— Monthly price2.00, Annually price20.00. - Label
+25 GB, Value25600— Monthly price4.50, Annually price45.00.
- Label
- Click Save Configuration.
Warning: Leave a cycle’s cell blank if the option is not sold on that term. Typing
0does not make it free — a zero price with a zero setup fee is treated as unpriceable and the customer is stopped at checkout. See Product Add-ons.
Step 5 — Create the product #
Back on Catalogue → Catalogue & Groups, open the Web Hosting group’s ⋯ menu and choose Add Product — the group will be pre-selected for you.
General tab #
- Product Name:
Starter Hosting. - Group: already set to Web Hosting.
- Product Description: the feature list customers read on the store card.
- Available Upgrades / Downgrades: empty for now — it only populates once the product is saved into a group.
Pricing tab #
- Leave One-Time Price (Base) and One-Time Setup Fee blank — this product is priced by cycle.
- In the billing cycles table set Monthly Price
4.99, Setup Fee10.00. - Set Annually Price
49.99, Setup Fee blank.
The counter above the table should read “2 of 2 cycles priced”.
Provisioning tab #
- Choose your panel from Integration Type.
- Pick the Panel this product provisions on.
- Enter the Package / Plan ID exactly as the panel names it.
- Optionally set AutoSSL, Suspend after (days past due) and Terminate after (days after suspend).
Choose None / Manual Processing if you are not automating yet — orders wait for staff instead.
Store & SEO tab #
- Product Sort Order
0. - Leave Include in Store and Allow Direct Link on.
- Switch Highlight Product on if this is the plan you want badged “Most Popular”.
- Fill in SEO Title and SEO Description.
Click Create Product. See Creating and Editing a Product for the full field reference.
Step 6 — Attach the add-on #
The add-on column only exists on an existing product, so reopen Starter Hosting:
- Go to the Options & Add-ons tab.
- Under Available Add-ons, tick Extra Disk.
- Leave the left column alone. Primary Domain is assigned on the group, and that picker only shows this product’s own assignments, so the field appears unticked here and still reaches the order page. Tick it only if this product needs different switches from the rest of the group.
- Save Changes.
Step 7 — Create the launch coupon #
- Open Billing → Coupons → Create Coupon.
- Name
Launch offer, CodeLAUNCH25. - Discount Type Percentage (%), Discount Value
25. - Quantity Limit
100. Set an Expiration Date if the offer is time-boxed. - Leave Apply to ALL Products & Addons (Global) off, and under Restrict to Groups pick Web Hosting.
- Leave Apply discount to Setup Fees and Apply discount to Addons on so the whole first invoice is reduced.
- Click Create Coupon.
Note: The discount applies to the checkout it is used on, once. Recurring and duration are stored but not applied to renewal invoices. See Coupons and Discounts.
Step 8 — Test it as a customer #
- From the product row’s ⋯ menu choose View in Store, or copy the Direct Link to Product from the Store & SEO tab.
- On
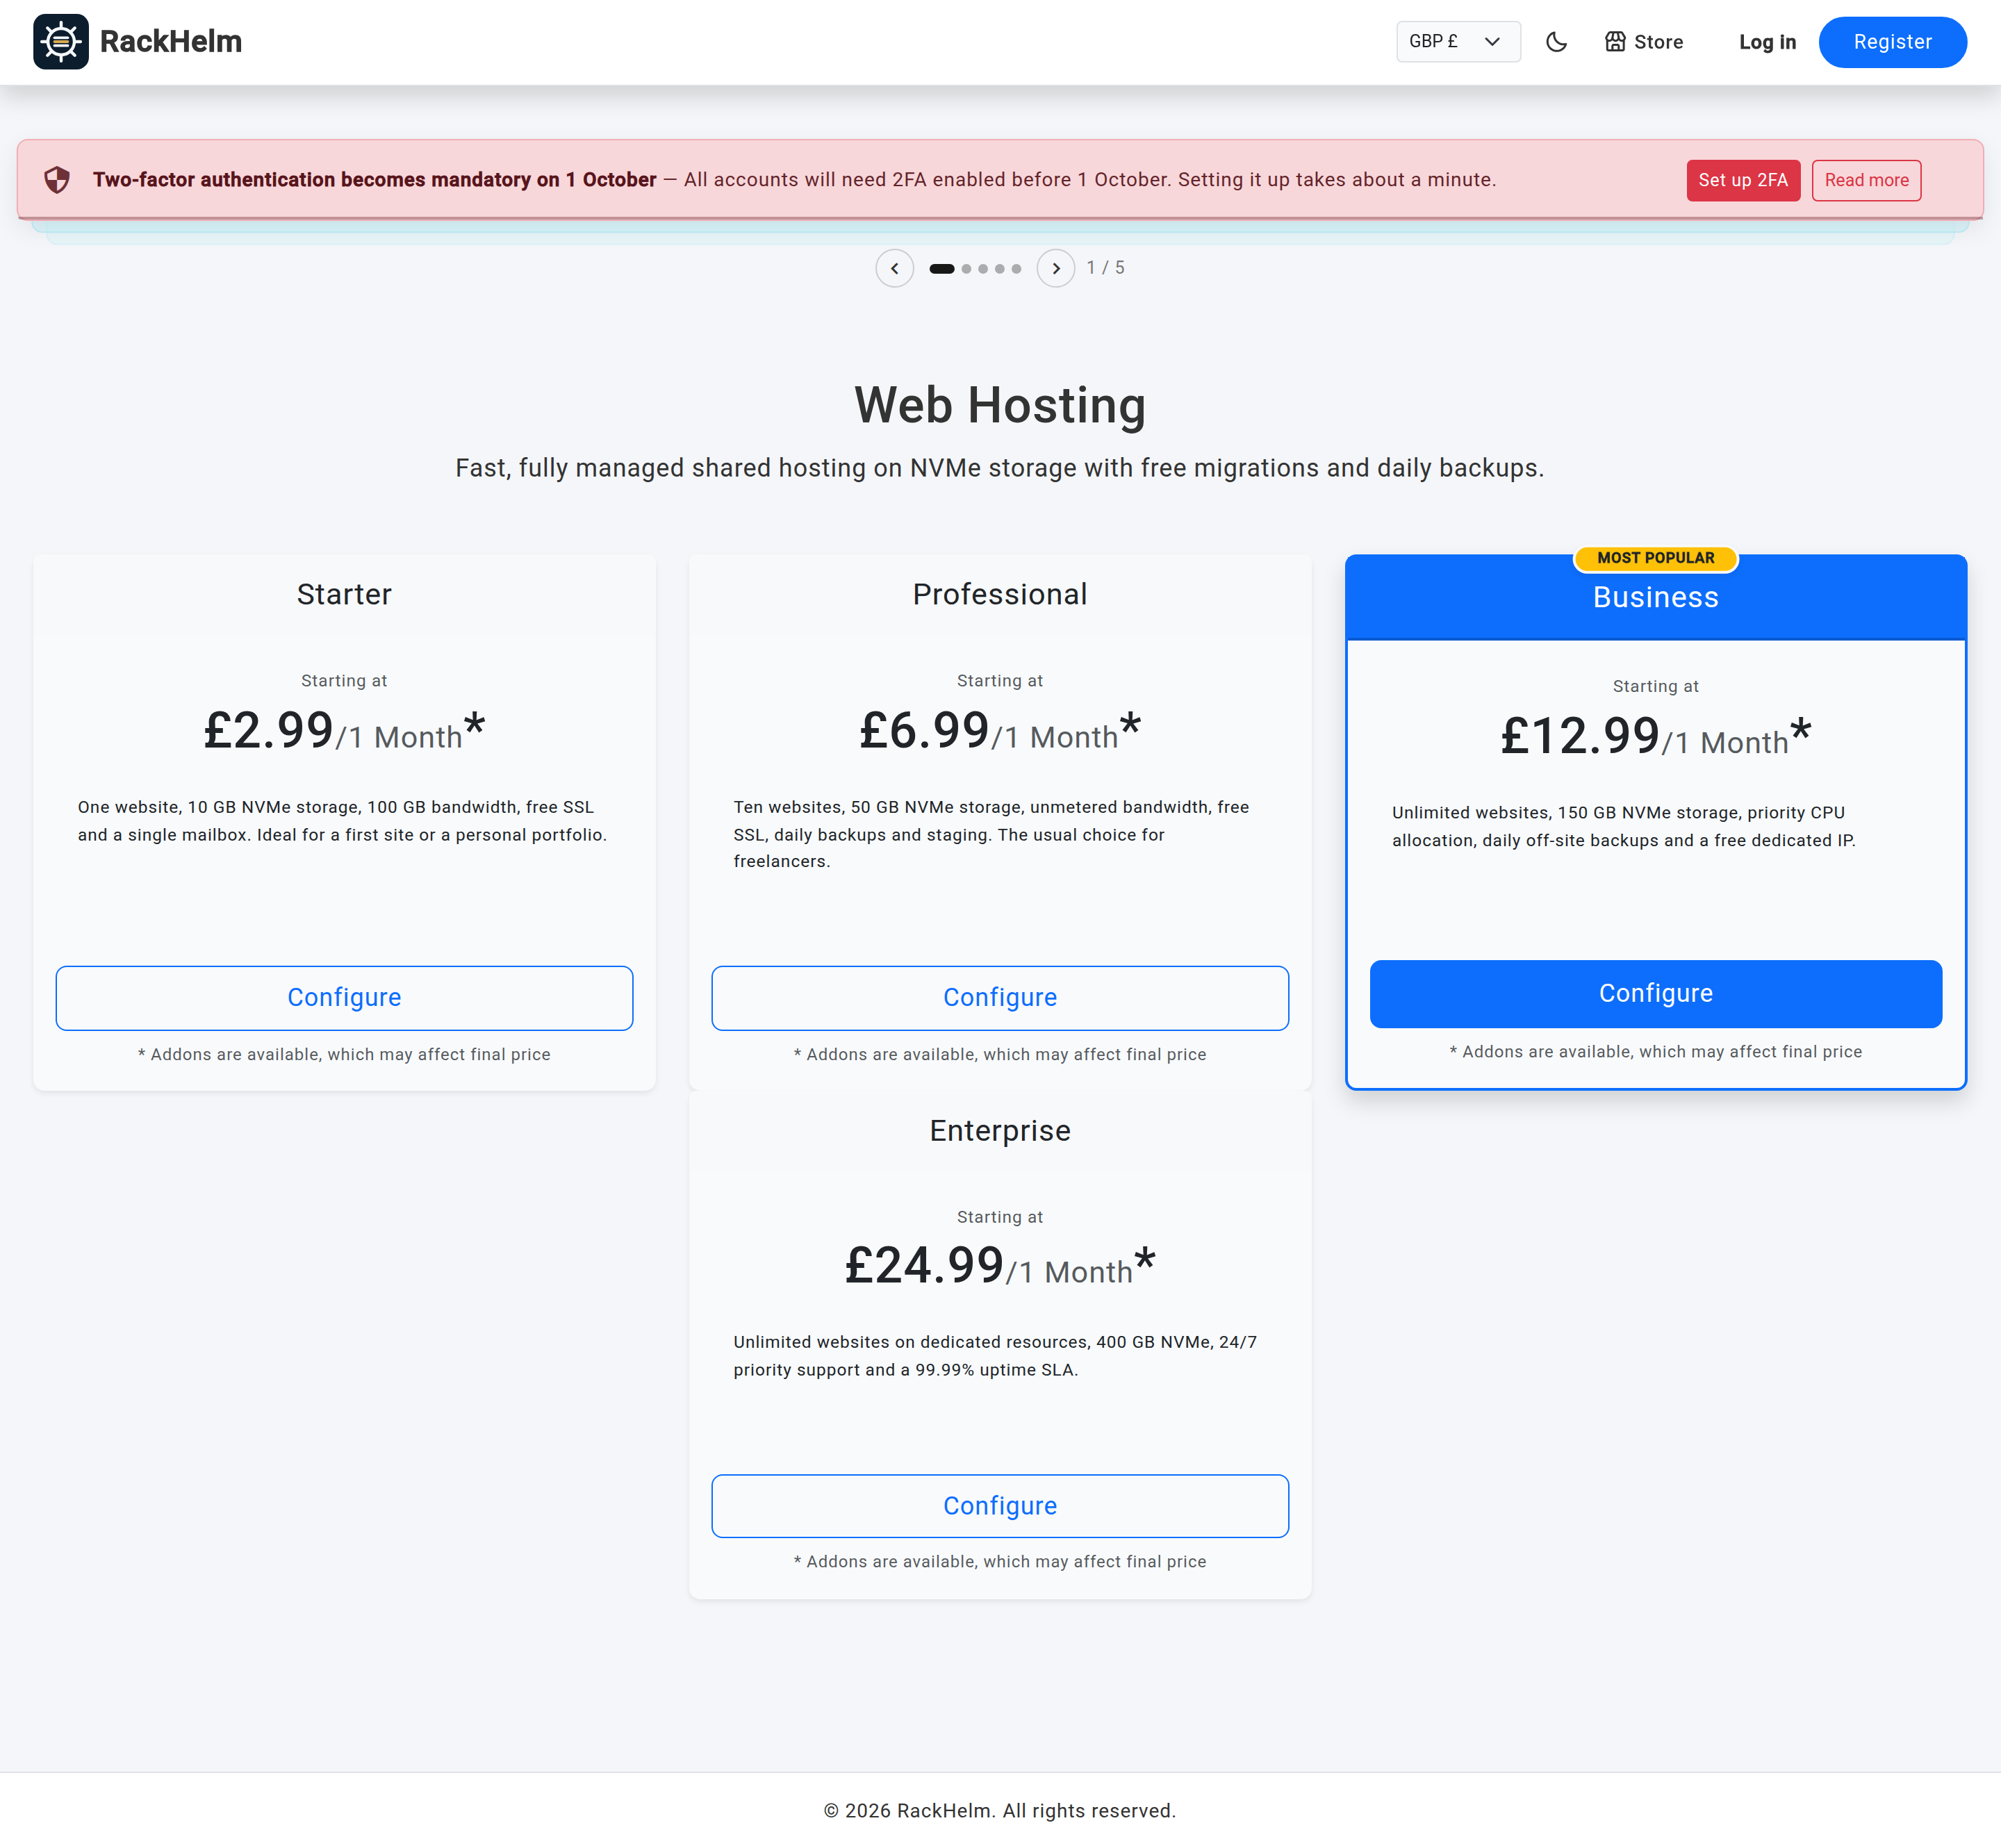
/store, confirm the Web Hosting card is listed. - Open the group page and confirm the pricing card shows £4.99 with the “Most Popular” badge if you set it.
- Open the product. You should see a Configuration section with Primary Domain marked required, a billing-cycle selector showing both terms with the annual saving, and an Extra Disk dropdown defaulting to “None”.
- Add it to the basket, apply
LAUNCH25in the Promo Code box on the checkout page and check the total falls by 25%.
If something is missing #
| Symptom | Cause and fix |
|---|---|
The group does not appear on /store. |
Include in Store is off on the group, or every product inside it is inactive or hidden. |
| The product page returns 404. | The product is inactive. Activate it from the row’s ⋯ menu — Include in Store and Allow Direct Link are ignored while it is inactive. |
| Saving the product asks for a One-Time Price. | No cycle carries a price. Fill in at least one, or set the base price to 0.01 or more. |
| No Configuration section on the order page. | The field is assigned but Show on Order Page or User Changeable is off, or it was assigned to a different group. |
| Extra Disk is missing from the order page. | It is not ticked on the product (and not attached to the group), it is not marked Include in store, or it has no price for the cycle being viewed. |
| The coupon is accepted but nothing changes. | The restriction did not match. For this example the restriction must be the Web Hosting group; a cycle restriction would also exclude any line with no cycle chosen. |
| Checkout reports a pricing problem. | Something resolved to zero. Check for a cycle or add-on cell containing 0.00 and blank it instead. |
| An order is placed but nothing is created on the panel. | The Provisioning tab is set to None / Manual Processing, or the Package / Plan ID does not exist on the panel. Check the pending-provisioning queue in the admin area. |


